
How to batch resize images using Automator

Quickly batch resize images using the built-in Automator app on your Mac. It can rename files too—handy for those odd jobs that shouldn't take all day.
Summary: You can batch resize images using Automator on Mac by creating a custom workflow. Set it to resize multiple images at once, saving time and ensuring consistency across your files.
As an efficiency guru, I'm here for anything that can help make digital processes easier or faster*, so I can spend my time on the juicy stuff. Enter... Automator!
Automator is a nifty little app for running workflows on your Mac, including:
Workflows within the Automator app
Workflows run by other applications
'Quick actions', added to Finder windows, the Touch Bar or Services menu
Print plugins, within the printing process
Folder actions, within Finder
Workflows that are triggered by a calendar event
Workflows within the Image Capture app
Workflows that run when dictation is used
*See related: How to get the best out of Siri, for some handy voice commands.
Batch resize images
This is the Automator feature I use the most, and in the category of 'things I feel like not everyone would know unless someone else has told them' so here tis!
In this video (7min), I show you how I use Automator to resize and rename a batch of images:
Here's what's covered:
0:15 What is the Automator app
0:23 What it can do
0:50 Launch the app
1:09 Setup a new 'automation' workflow
4:03 Run the new workflow
4:29 Review the newly created images
5:00 Save as reusable workflow
And here's what it looks like in the app:
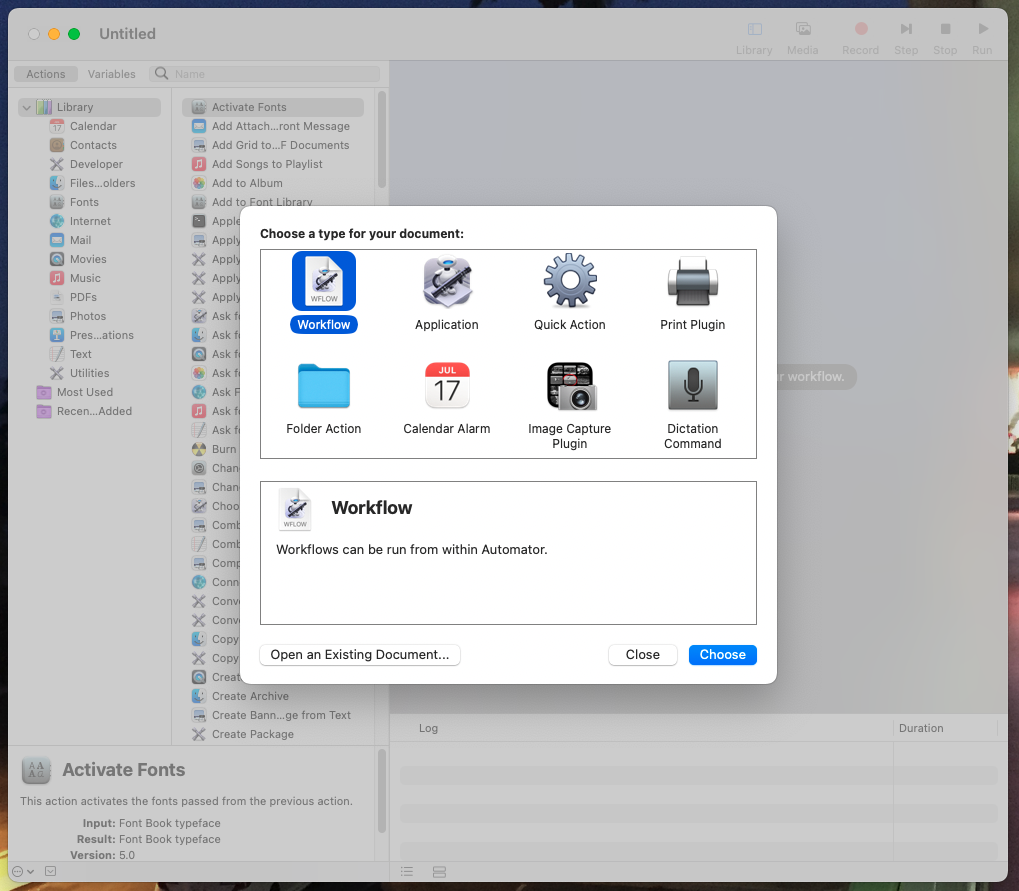
New Automator workflow screen
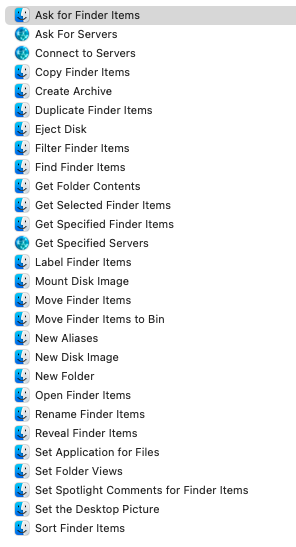
File action options

Image action options
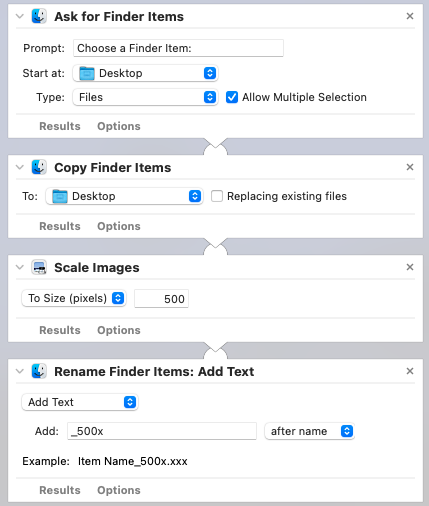
An example workflow in Automator
The steps used for this workflow are:
Ask for Finder items (allow multiple)
Copy Finder items
Scale images to size (eg 500 pixels)
Rename Finder items: Add text (eg. '_small500x' after name)
Saved Automator workflow icon
You may not need it often, but when you do it can save hours.
Happy Automator-ing!
Batching images like a pro? Now streamline the rest of your workflow
Automator's great for saving time on repetitive tasks. Imagine what well-designed systems could do for your whole business.
Want a ready-made setup that keeps your projects organised?
The Organised Creative Notion Template helps freelancers track work, manage tasks, and stay on top of admin, so nothing slips through the cracks.
EXPLORE THE TEMPLATE →
Systems for everything, not just work?
The Most Organised Person I Know shows you how to design simple systems that reduce mental load and help your work flow more smoothly, from daily tasks through to long-term projects, at work and at home.
GET THE EBOOK →
Don't stop at clever tools. Build systems that support your whole creative process.