
If you’re a Mac user editing how-to videos, iMovie might be for you! Here’s how I sync, trim, subtitle, and export simple YouTube videos.

Summary: This guide outlines how to edit YouTube how-to videos in iMovie, covering syncing audio and video, trimming, adding transitions, and exporting the final video with subtitles.
iMovie is Apple’s free video editing app for Mac, and honestly—it’s kind of perfect for basic YouTube content. I’ve used it for all my videos so far, and it works because:
- It’s free
- It’s already on your Mac
- It’s easy to learn
Here’s a very meta walkthrough video (7min), where I talk through the iMovie editing process using a recent video (which is now live!):
My 8-step iMovie editing workflow
- Record my ‘talking head’ video using an iPhone while simultaneously recording my screen with the Quicktime app
- Drop both movie files into iMovie, along with an image file of the Producing Paradise logo
- Bookend the video with the logo, using a cross-dissolve transition at both ends
- Align the talking head with the screen recording (using the audio to find the perfect timing match)
- Detach the audio from both videos and delete whichever audio is worst quality — I usually go with my iPhone audio over the laptop, but it entirely depends on your equipment and setup
- Edit out the ‘umms’ and ‘ahhs’ throughout, and make any other content tweaks along the way
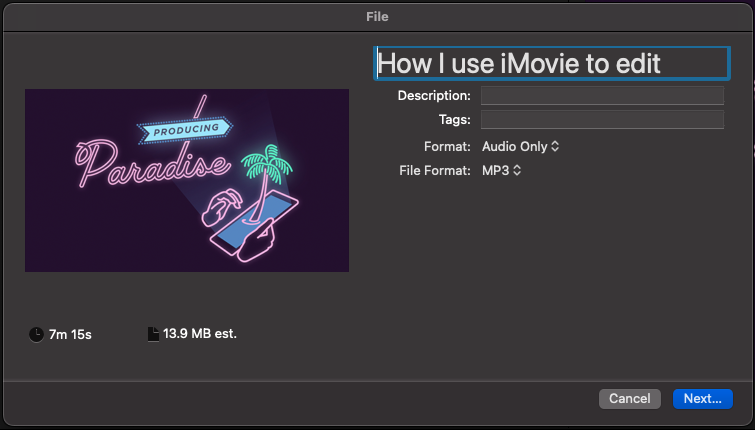
- Export the audio to use in Otter.ai for subtitle transcription
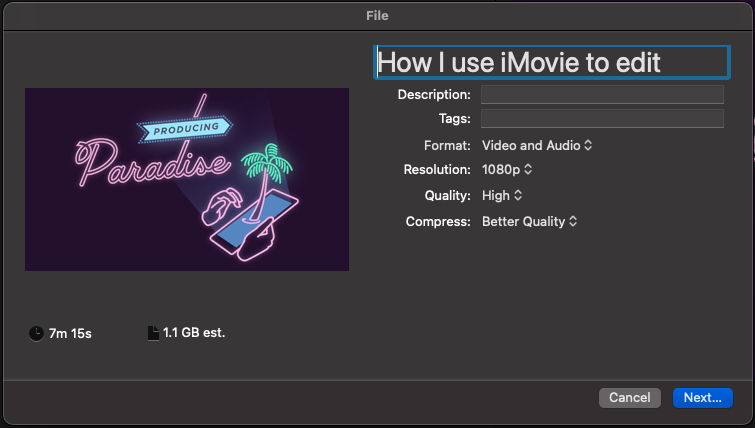
- Export the video to upload to YouTube — I use 1080 resolution with ‘high’ quality and ‘better quality’ compression but that’s just to keep the export/upload timeframe reasonable (ie. I know I should probably export at higher quality but I go for efficiency over perfection!)
Picked up a new creative skill? Now streamline your entire business workflow
Learning tools like iMovie is valuable—but having efficient systems for your entire creative business can transform occasional projects into a thriving operation.
Are you a freelancer juggling multiple creative projects?
Our Organised Creative Operating System gives freelancers a complete Notion template to manage projects, track ideas, and stay organised—helping you build systems that support your creative business whether you’re designing, writing, filming, or all of the above.
EXPLORE THE TEMPLATE →
Need to optimize operations in your creative small business?
An Operations Review helps small business owners identify inefficiencies and design systems that save time and money. We’ll map out practical improvements that help you deliver quality work to clients without the administrative overwhelm.
BOOK A FREE 15-MIN DISCOVERY CALL →
Build systems that help you turn creative skills into business success.
I think it would be better if you leave the ‘umms’ and ‘ahhs’ (or learn not to say them) because whenever you cut them out the visual part shows a “hiccup” which is in my opinion more distracting than natural flow of ‘umms’ and ‘ahhs’ we’re used to hearing everywhere.
Oh, interesting! Thanks so much for taking the time to leave feedback — I hadn’t considered the disruption to ‘flow’ when I’m taking those things out (I had assumed it was the opposite, ie. that it would be distracting when I use too many of those filler words). Will keep this in mind next time I’m editing.