
How I use: Dropbox for iPhone photo storage and backup

How to stop clogging up your phone storage with photos, by taking them off your phone and putting them in the cloud AKA using Dropbox for iPhone photo storage.
Summary: Using Dropbox for iPhone photo storage and backup keeps photos safe and easy to access across devices, without chewing up your Apple cloud storage.
For those of us with an iPhone who take a lot of photos (cough, like me, cough), it’s an eternal battle for phone storage space. This is how I process my photos, on a weekly-ish basis, from my iPhone into Dropbox.
I’m wary this is a niche topic, applicable if you:
📸 Take a lot of photos on your iPhone;
📱 Don’t want to use your phone as a photo storage device;
💻 Have a laptop or other computer; and
📦 Choose to pay for a cloud hosting service like Dropbox, rather than Apple iCloud.
This scenario works for me, as I like to sort, ditch and organise my photos while in the process of manually moving them off the phone and into Dropbox. Once in Dropbox, they’re backed up and I can access from any of my devices (laptop, phone, iPad, or a web browser on someone else’s computer). I use the ‘Make available offline’ feature for any images I still want to be able to see on my phone, which just means going into the Dropbox app to see them, instead of the camera roll. I find the empty iPhone camera roll obscenely satisfying, knowing that nothing is piling up in there.
So this is it: how I use Dropbox for iPhone photo storage and backup, AKA iPhone (camera roll) zero.
Dropbox for iPhone photo storage
The instructions are skewed towards an iPhone/Mac combo but sentiment could be applied elsewhere. First a disclaimer: my method is not for everyone! You might be happy to pay for Apple iCloud and let it backup automagically. Or if you use Dropbox and don’t want to spend time “processing” your images, turning on ‘Camera uploads’ could be for you. Or maybe you delete unwanted photos as you go, aren’t as trigger happy with the camera, or just don’t have a problem with phone storage space — if that’s the case, I bid you congratulations and suggest you skip the rest of this article and make yourself a nice cup of tea.
If you're more of a watcher than a reader, here’s a video version (4min):
Here's what's covered:
0:19 Why do this / why bother (!)
0:47 Plug in phone
0:55 Open the Image Capture program
1:29 Select folder to save images to
1:43 Sort by kind
1:50 Remove AAE sidecar files
2:13 Cross check number of downloaded images match phone
2:27 Delete images off the phone
2:41 Sort and move downloaded images
...and checkout SizeUp for doing that quick 50-50 split view.
Step 1.
All the fun takes place on your computer, where you can easily see and sort things, so the first step is to plug your iPhone into your computer.
❗ Don’t be fooled if any default suggestions pop up when you do this, including the native Photos app — you may need to check your settings there if it does. In this scenario the Photos app is rendered useless, so I turn my iCloud photo backup off on both the Photos app on my computer, and for Photos in iCloud on my iPhone.
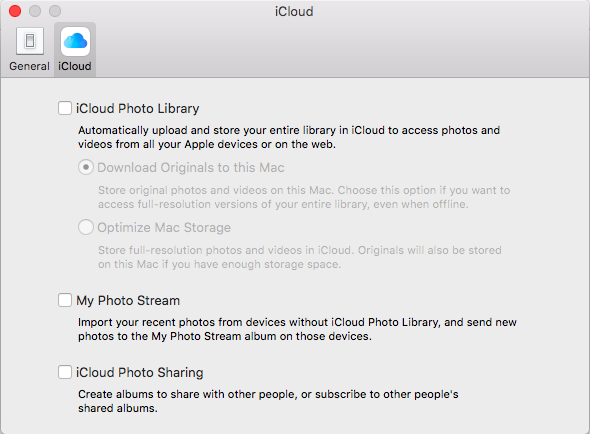
iCloud is off in my Photos app settings
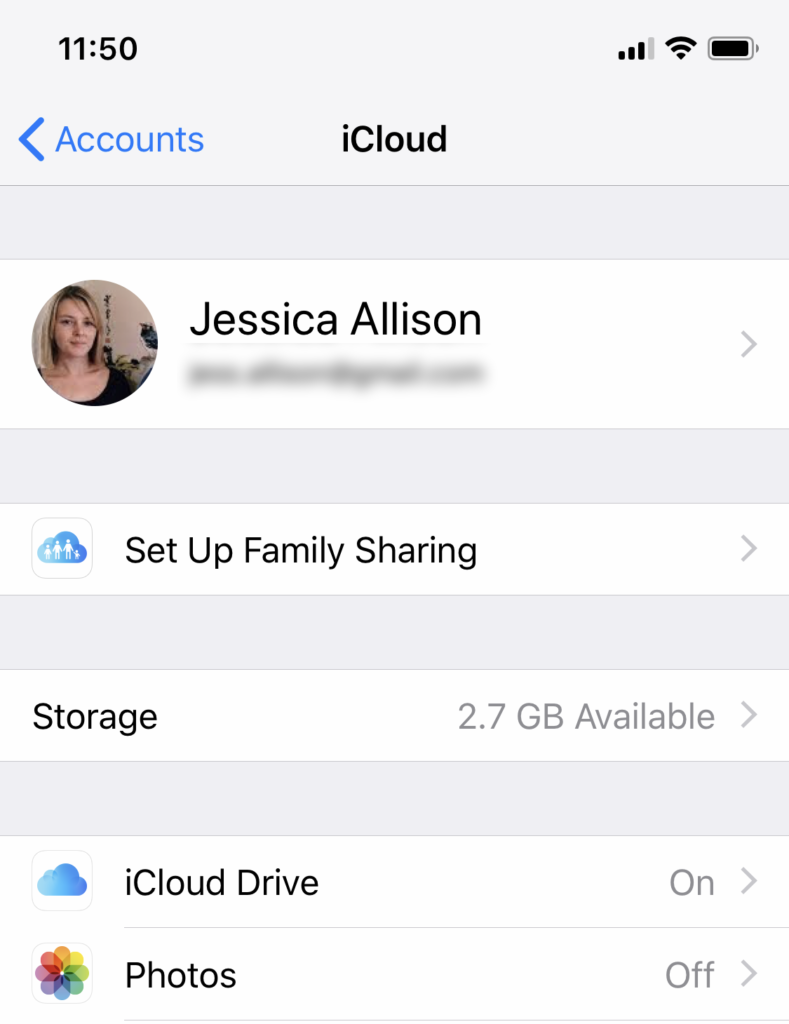
iCloud is off for Photos on my iPhone
Step 2.
Open 'Image Capture' — this is the native photo download app for Mac, used to retrieve images off a phone, digital camera, memory card or scanner.
💡 Pro tip: hold command+spacebar to bring up the inbuilt Mac search feature, then start typing “Image Capture” to find the app. This is a quick way to open any app, file or folder when you know the name of it.
Step 3 (optional, but recommended!).
Start a new folder called 'Downloaded today' and save all the photos from your phone that you want to backup (e.g. sort by date and copy only photos from this month, or this year… whatever period you’d like to bring across to Dropbox). I’m a purist, so I download every single photo from my phone here.
🤷🏽 Note: It doesn’t really matter where this ‘Downloaded today’ folder is put, because it’s only temporary — you’re going to delete it at the end. I use the Desktop or Downloads folder.
✅ Also... you could turn on automatic camera uploads for Dropbox and use that folder instead, since the photos would already be saved there, but I prefer knowing which ones I’ve definitely “processed”.
Step 4 (optional).
Once downloaded, I start in list view and sort by 'Type' so I can see all the 'AAE sidecar' files together and delete them! These are ‘edit info’ files, not real images, but you should keep them if you’re worried about losing any edits made while the photo was on your iPhone.
Step 5.
Open a Finder window to where you want to store the photos on Dropbox. This part is up to you, but I like using ‘Photos > iPhone’ and then subfolders for my image categories.
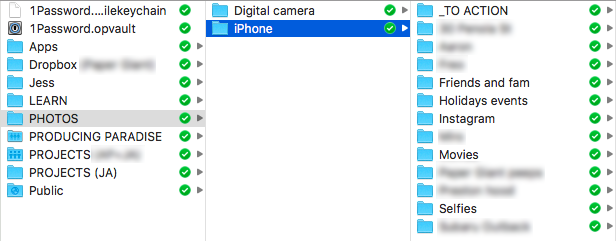
'_TO ACTION' is my folder for things to follow up, like when I’ve snapped a photo of something in a magazine while at the hairdresser, or a photo of someone’s business card whose details I need to transfer into my contact list.
💡 Pro tip: Using an underscore at the start of the folder name will make sure it appears at the top of the list when sorting alphabetically.
Step 6.
Sit the two Finder windows side by side, so you can see your ‘Downloaded today’ and category folders on half the screen each. Here I change to icon view for the images I’m about to sort.
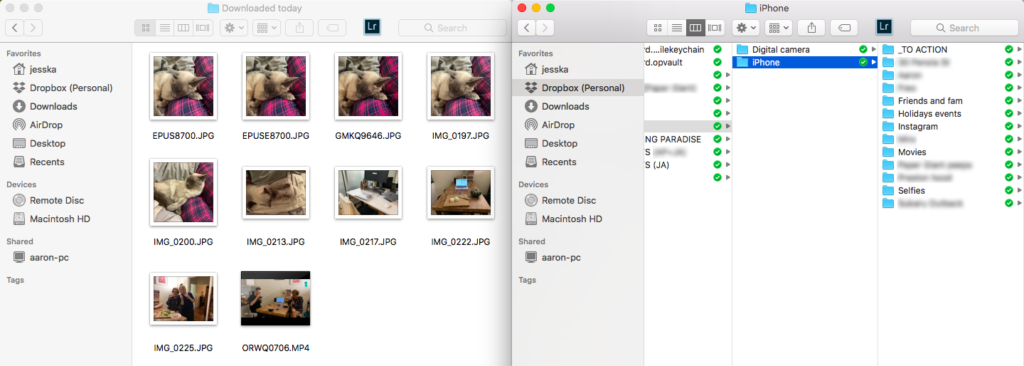
💡 Pro tip: I use SizeUp to sit my finder windows neatly side by side.
Step 7.

Right click into the ‘Downloaded today’ folder, choose 'Show view options' then turn up the icon size, so you can see what’s what.
Step 8.
While you're going through photos in the 'Downloaded today' list, hit spacebar when an image is selected to see it large (then spacebar again to reduce).
Step 9.
Hold the command key to click on multiple photos before moving them across.
Step 10.
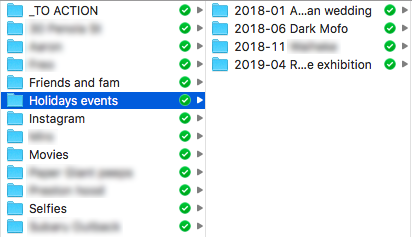
You might like to create 'subfolders' for particular events when there are a large set of photos for them:
Step 11.
Once you're happy that all the photos have been saved into their rightful home / relevant folder in Dropbox (and are backed up there, denoted by the green tick) — so the ‘Downloaded today’ folder should be empty — you can go back to Image Capture and delete those images off your phone.
Step 12 (optional).
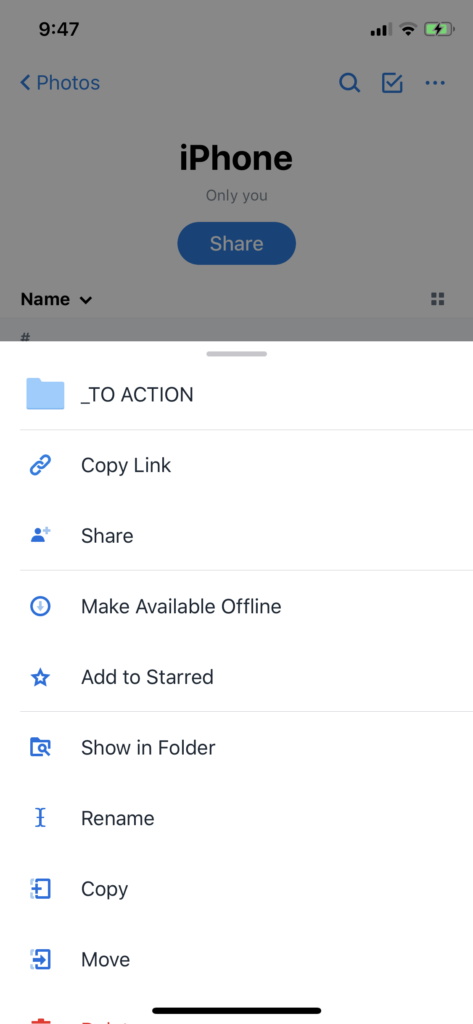
On the Dropbox app on your phone, you can make certain folders available offline so you can see these anytime without using your mobile phone data.
And voila, iPhone (camera roll) zero! Replaced by backing them all up to Dropbox, and making available offline on an as-needed basis only.
One thing this photo processing technique has taught me is that every single photo you take becomes a promise to your future self to deal with it later (one way or another), and sometimes the answer may be not to take the photo in the first place.
Psst… if you use this referral link to sign up for Dropbox, we'll both get extra storage: 500 MB for Basic users and 1 GB for Plus.
Sorted your photos? Time to organise the rest.
Organising your photos is one piece of the puzzle. Creating efficient systems for all your digital assets can transform how you work.
Could you use a system for more than just photos?
The Organised Creative Operating System is a Notion template to manage files, projects, and digital assets, helping you keep everything organised and accessible, not just your photo library.
EXPLORE THE TEMPLATE →
How about systems that work across your whole digital life?
The Most Organised Person I Know shows you how to design simple systems that reduce mental load and help your work flow more smoothly, from daily tasks through to long-term projects, at work and at home.
GET THE EBOOK →
Because if you can organise your photos, you can organise the rest.
This post contains affiliate links. This means we may earn a commission if you purchase services through these links without any extra cost to you. This commission helps us keep the site running. We appreciate your support!