Tame your unruly calendar and manage your time more effectively with these Google Calendar advanced settings tips.
Jump to a section:

Summary: This article outlines some Google Calendar settings you might not be using, like multiple time zones, speedy meetings, colour coding, focus time and syncing between devices.
Here are six tips that I use to help manage my Google Calendar professionally and personally. By making a few tweaks to the default calendar settings I’m able to easily manage my work and personal calendars more productively and collaboratively.
Add a secondary timezone ⏰
Google Calendar allows you to set a secondary timezone and have it displayed in your default view. This is super handy if you have family in another part of the world or work for a global company across different time zones.
To enable a secondary timezone follow these steps in Google Calendar:
- In the top right, click settings
- In the time zone section, click display secondary time zone
- Click secondary time zone and configure as required
Hot tip: if you have recurring meetings scheduled they will always follow the default timezone of the meeting orgsaniser. This means that when timezones shifts occur such as daylight savings beginning or ending, the meeting will remain at the same time for the meeting organiser. This often results in a new meeting time for anyone not at the same timezone.
I recommend reviewing recurring meetings when you experience a daylight savings change to ensure the meeting time is still accessible for all attendees.
Set up a world clock 🌏
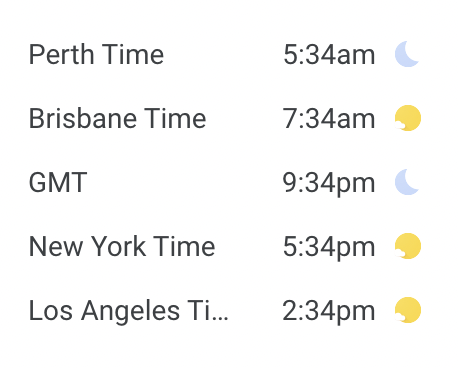
World clock allows you to create a widget that displays in your calendar sidebar with any number of world clocks selected. This is a helpful way of being able to know the current time at any set location.
To enable a world clock follow these steps in Google Calendar:
- In the top right, click settings
- In the world clock section, click show world clock
- Click add timezone and as many as required
Refer to Google’s help guides for additional tips to manage your calendar across different timezones.

Enable speedy meetings & default duration ⏱
I used to rely on the default meeting time setting to make sure I wasn’t by default always setting 60min meetings. I still rely on this setting, however, it’s now further elevated with the introduction of the speedy meeting functionality.
Speedy meetings allow you to by default end 30-minute meetings 5 minutes early and longer meetings 10 minutes early.
Actions always speak louder than words, and enabling speedy meetings signifies an awareness and care for everyone’s time. It creates space for yourself and others to take time between back-to-back meetings and:
- Refresh and gather thoughts to more easily context switch
- Finish notes from the meeting prior
- Prepare for the upcoming meeting
- Take a bathroom break or fill up your drinking glass
To set a default meeting duration & enable speedy meetings follow these steps in Google Calendar:
- In the top right, click settings
- In the event settings section, set your default meeting time
- In the event settings section, click to enable speedy meetings
Hot tip: you can always adjust the meeting duration at the individual event level. However, setting a default meeting time & enabling speedy meetings helps to remove any unconscious decisions and defaults.
Colour-code calendar events 🎨
I have two Google calendars one for work and one for personal. I prefer to keep these separate and not sync across devices or tools. Two calendars are manageable for me, one thing I like to do is colour-code events in my calendars. I do this to help with:
- Scannability & visibility
- Context switching
- Setting expectations for myself
Here are some examples of different event types that I choose to colour-code:
Personal:
- Birthdays & anniversaries
- Bills & payment reminders
- Scheduled appointments
Professionally:
- Project specific meetings
- 1:1 with direct reports
- Pulse-check team meetings
- Company-wide meetings
To set a colour label on individual events follow these steps in Google Calendar:
- Click the edit icon on any event
- Click on the calendar name to expand the section
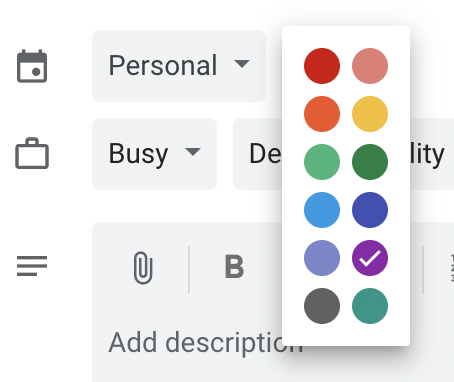
- Next to the calendar name, select the colour label of your choice and save
Tip: You can also right-click an event invitation to assign a colour label.

Time block & enable focus time 🎯
Time blocking and adding focus time to your calendar is a great way to help you take back control of your time. Adding focus blocks to your calendar not only allows you to manage your own expectations and boundaries but it helps others to be respectful of your time too.
Simply add events to your calendar and title them with the activity you are actioning at that time. Make sure to select busy and even colour-code to help with your own scannability.
Hot tip: do this at the start of each week to help you manage and achieve your tasks throughout the week.
If you are using a Google Business account focus time functionality will be enabled which provides a separate event type for focus time. This event type has additional settings such as automatically declining meetings during this time. Learn more about focus time in Google’s help centre.
Sync calendars across devices 🔄
I keep my professional and personal calendars separate and do not sync across devices. This allows me to set boundaries in the workplace and encourages my right to disconnect.
However, I do like to sync my personal calendar across my personal phone and computer. This ensures I am always using one calendar and that all of my reminders and events are in one place.
There are a number of ways you can add your calendar to different devices and control the settings. Here are some helpful guides to follow:
- Add Google Calendar to Apple Calendar (computer)
- Add Google Calendar to your iPhone or iPad
- Sync your Google Calendar with computer programs
I hope you found some value in this post! Take a look at this post for further tips to help manage your work & personal schedules.